For this week’s experiment, I was inspired by lava lamps.

I wanted to create something calming and has some sort of slow-moving animation. This is what I’ve come up with. Try playing around with the sliders for some effect.
My Journey at ITP NYU
For this week’s experiment, I was inspired by lava lamps.
I wanted to create something calming and has some sort of slow-moving animation. This is what I’ve come up with. Try playing around with the sliders for some effect.
With the final project coming around, Paulami, Nick and I started brainstorming about what it is that we want to make for our Physical Computing final.
I was mesmerized by a game called Spaceteam. It is “A cooperative shouting game for phones and tablets”. The idea is that all of the players are in a team that is flying in a spaceship, and they have to work together to keep the ship flying and out of danger. It involves a lot of communication and teamwork.
Jumping off from the game, I started trying to boil down the principal ideals that makes Spaceteam such a great game. For me, what makes it so great is that Spaceteam tries to explore the idea of facing imminent doom in a comical way. It is both absurd and scary, and the natural reflex to cope with that is somehow humor.
I try to push this idea of “facing imminent doom in a comical way” in our brainstorming sessions. During our brainstorming sessions, we try to think of things that we might want to make, we include concepts, interactions, and themes. Here is some of the result.
Concept. The concept of our creation is that we will make a game. It will be a cooperative game between 2-4 people. We want it to be fun and is immediately graspable. But we also want to have a deep backstory so that it is not easily forgotten.
Interaction. We want the game to have a lot of physically tactile interaction such as turning on knobs, sliding on sliders, switching on switches, shaking things, or even jumping. We also want to force the players to work together in a way that makes everyone is responsible for everyone else. And we want it to be loud and rowdy.
Theme. We try to go with “facing imminent doom” as a starting point. We landed on the backstory where the earth is falling apart, and all humans have left the earth, except for the people who are playing. They must then work together to try to leave earth. But plot twist, they really can’t. Death is imminent, but have fun (maybe).
After formalizing our concept for a Trick or Treat Vending Machine, Rita and I went ahead with the production.
For the sake of time, we divided the production between the two of us. I would start work on the electronics and vending mechanism, while Rita would start work on creating the enclosure.
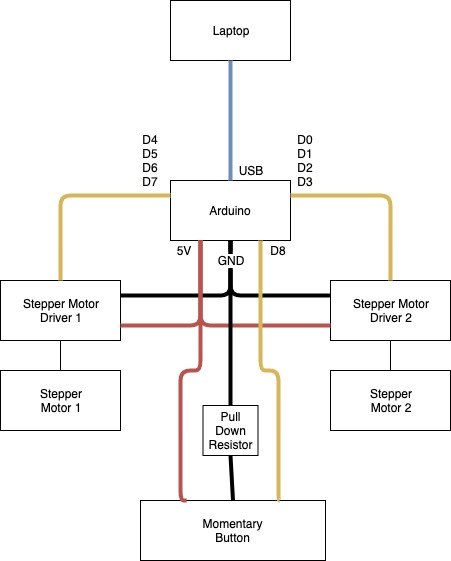
I started work with the circuit. I used the circuit below to create the vending machine. Once I got that working, I went ahead with creating the mechanism for the display. I decided early that the brains of the operations will be the laptop instead of the Arduino, due to the fact that in the laptop, I can run a Javascript runtime, while Arduino uses a modified version of C++. As limited as Javascript is, there is just much more abstraction that can be done there that will make my life easier. I’ve put the code for the display in this repository, and the code for the Arduino can be accessed in this link. After that, I created some videos that will loop over and over in the display and serve as our animation. The videos can be accessed here.

On the other hand, Rita was working on the enclosure. We made the mistake of using cheap wood for this project. A key point that we forgot was that cheap wood tends to morph and distort. This caused some problems for us when creating the box. However, Rita was a champ and she delivered a beautiful box.


After the two main units are done (enclosure and electronics), we went ahead with the assembly of it. We were expecting problems but things went very well. We manually coiled up a brass rod to serve as our vending machine coil, and it works like a charm. You can see the inside of the machine in the video below.
And this is the final product in action.
This week I’m playing around with pixel-level manipulation on images and the webcam feed on a web browser. Inspired by this video, I created a “mirror of mirrors”. The idea is to create a mirror made out of tiny mirrors. It is made using p5.js. The sketch can be viewed in this link.
After creating a rough cut, we did some things to make the video more cohesive and to more effectively get our point across. We also added some animation to brighten up the video and add to the comedic tone.
Here is the final result.
After storyboarding, shooting, and some editing, we’ve come up with a rough cut for our video about iRemember. Here is the result so far.
We were tasked to create a video that satisfies one of the options below.
Option A: A 2-4 minute (max) promotional video for an invented object or service. This could be an infomercial, a design fiction, or an instructable
Option B: A 2-4 minute (max) alternative, speculative, or counterfactual video for an existing thing or service. This could utilize a genre such as documentary, whodunit, commercial, horror trailer, etc.
Me and my team (Adrian and Simone), decided to create a comedic-dystopian-infomercial for iRemember, a patch that one can stick on their forehead that will give them the ability to take photographs with their eyes and store it in their memory. There is a twist though, after a while, the iRemember patch will actually start to take over people’s brains filling it up with photographs.
Here’s the storyboard that we’ve come up with for the video


After creating a sound-walk of my own, some things popped into my head that I feel are worth noting.
This is a project that I’m doing with Rita.
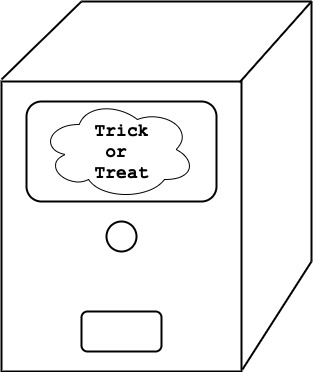
The idea for this project is a “Trick or Treat” vending machine. Users can push a button, then they will either be given a “trick”, which is some sort of scary toy or a “treat”, which is a candy bar. The decision is completely random. There will be animations showing on the screen to hype up the user before receiving the gift.


The vending machine itself will involve a small tablet computer as the screen and processor of the imaging (basically the brains). The computer will then be connected to a microcontroller which will detect the trigger of the button and also rotate the motors that will rotate the vending machine coils.
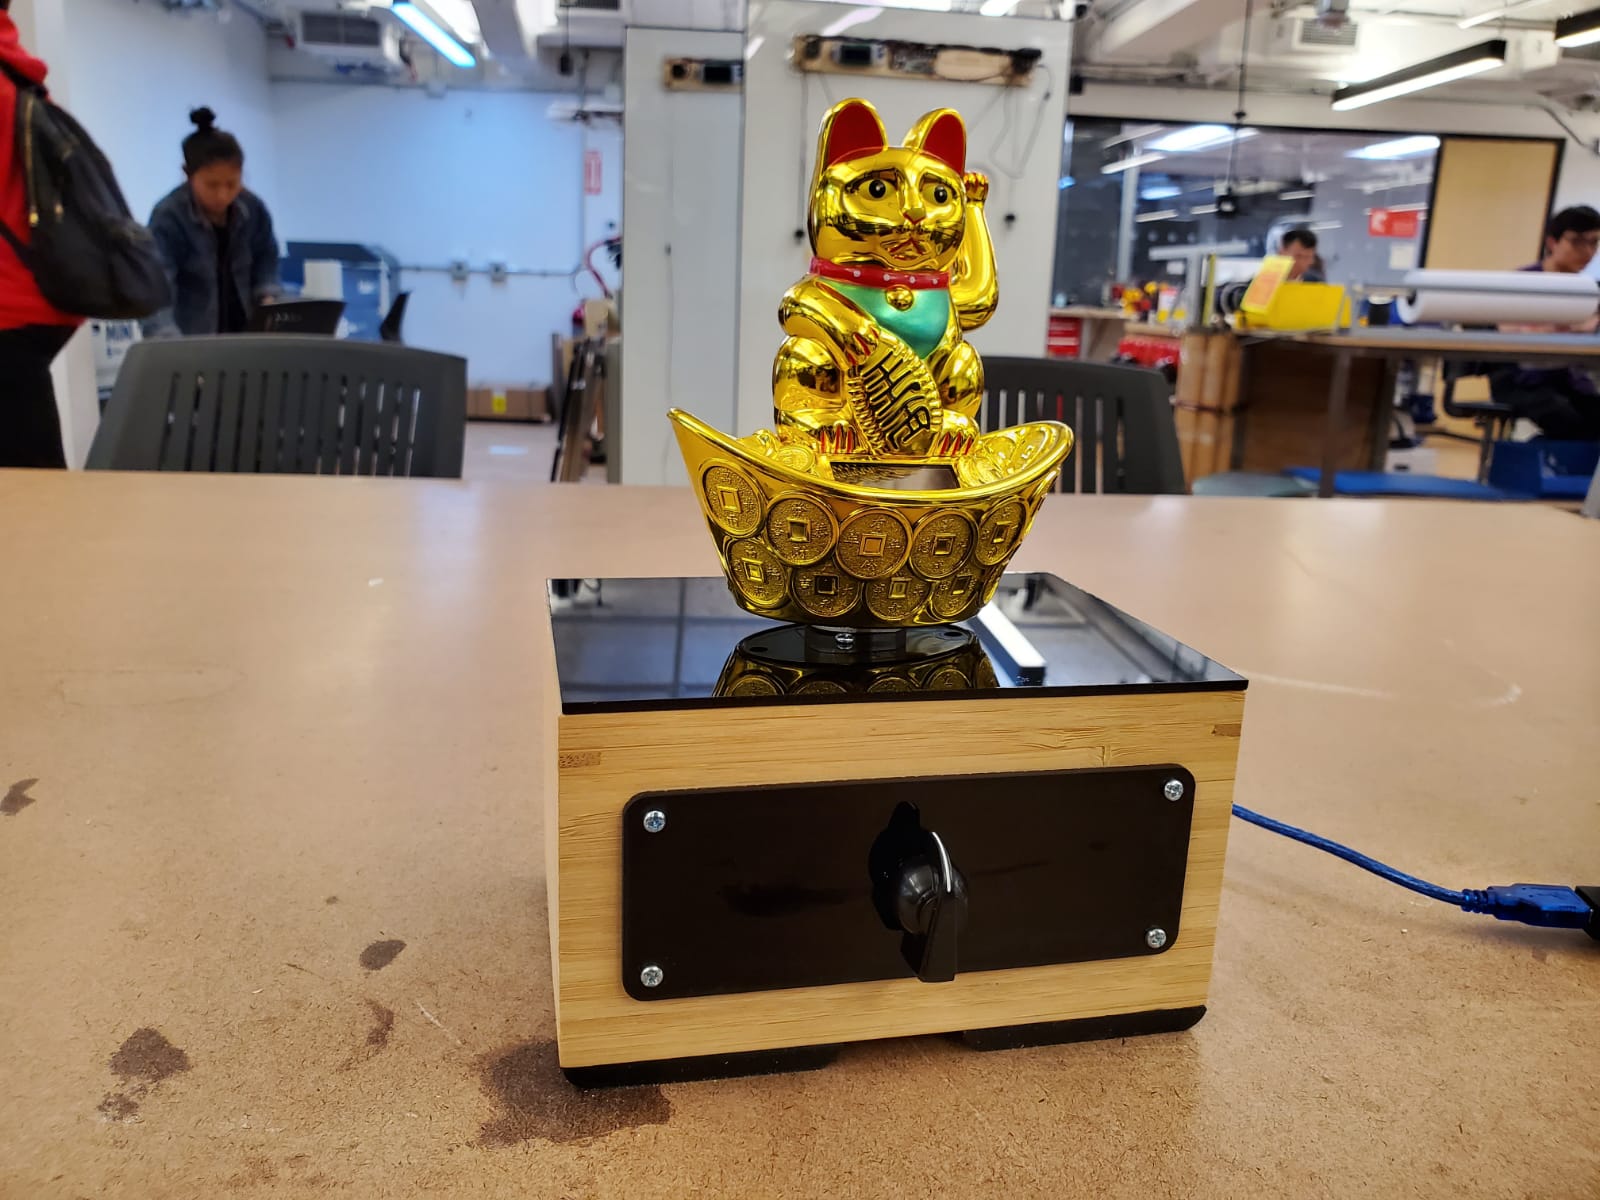

A fortune cat is a popular figurine among Asians. The eternally waving hand of the cat has magical properties that allow it to pull in good luck and prosperity into a business. With the hope of amplifying its luck-pulling abilities, I decided to start a project: a rotating fortune cat. That way the cat can pull in good luck from all directions, not just the front.
I started with the motor. I bought some panel-mounted stepper motors. They were very easy to mount but are pretty tricky to get up and running. I also added a potentiometer in there to control the speed and direction of the rotation. Here is the code I used to get the motor running.


After I got the electronics working, I dove into the assembly and fabrication process. I used a 4in by 6in bamboo box for the enclosure. The first thing I try to do was figure out the mounting for the potentiometer. At first, I wanted to use a sliding potentiometer just because it looks nice. I created a few prototypes until I landed a design that fit well.


It took some drilling and Dremel work to create the hole that will fit the potentiometer. After some time though, I was able to create the appropriately sized hole for the sliding potentiometer.
After that, I mounted the Arduino and motor driver into the box using standoffs.


However, sometimes luck is just not on your side even though you have a lucky cat with you. During the soldering process, I accidentally broke my sliding potentiometer, and I didn’t have time to buy another one. Plan B it is. I ended up having to use a rotating potentiometer instead. I had to create another mount and I had to adjust the hole to fit a taller potentiometer.

The final big thing to do is to create the lid and mounting for the cat. I made the lid out of acrylic using the laser. I did a few prototypes using cardboard first to make sure that the mounting holes are exactly right. I had also made the mounting for the cat using acrylic on the laser cutter.

Lastly, I assembled everything together and added some black rubber feet at the bottom to make it look nice, and it turned out to be amazing!

