I recently came into an article describing the origins why we measure time the way we do. There are 12 months in a year, 28-31 days in a month, 24 hours in a day, 60 minutes in an hour, and 60 seconds in a minute. Years, months, and days are defined through astronomical phenomenons, while hours, minutes, and seconds are relatively arbitrary. This gave me an idea: Why not make it decimal?
I’ve always been frustrated by the imperial measurement system. I have, and probably always will be, a metric man. 100 centimeters in a meter and 1000 meters in a kilometer, it’s clear. 1760 yards in a mile is unintuitive to say the least.
My idea is to make time work the same way. I’m not going to mess with year, month, and day because they are largely driven by astronomical events. I will, however, change the definition of hours, minutes, and seconds.
Here’s what I propose:
No AM/PM, it leads to confusions
100 decimal hour to a day (1 decimal hour == 14.4 minutes)
10 decimal minute to a decimal hour (1 decimal minute == 1.44 minutes)
100 decimal second to a decimal minute (1 decimal second == 0.864 seconds)
This clock is a clock that simulates what it would be like living in a decimal world
Upon reading the first chapter of A Sideways Look at Time, I came across this concept of Kairological time. Regular chronological time is (for the most part) constant. It follows a standard set of ticks, moving forward constantly, unyielding. Kairolgical time is somewhat cyclical, it follows the flow of life, opportunistic.
I like this idea of living following a kairological time. It is an opportunity to be more connected in what I do. This past year has been a rush of adrenaline, I constantly worry about not having enough time to do what I want. I would look at the time constantly worrying that I’m taking too much time performing a certain task.
I realize that this is not healthy. Yes, there is a positive aspect to being punctual, especially in a professional context. However, constantly looking at the clock, letting myself be pressured by time, is not constructive for my creativity or mental health. Growth happens when it happens, it does not stick to a timetable.
I made a clock that moves faster and faster the closer you are looking at it. I used the webcam to estimate how close the user is to the screen.
This serves as a reminder to myself to give me the time that I need, instead of using the time that I have. Quality of growth beats quantity of growth any day.
New York City is special in that it has a rich history of immigration and diverse racial composition. Starting at the beginning of the 18th century, New York City has been the main port of entry for immigrants coming into the United States in search of asylum, new opportunities, and prosperity.
This trend of immigrant influx continued through the post-war economic boom of the 1950s and contributed to the rise of local ethnic businesses in New York. That spirit of immigrant entrepreneurship continues to this day.
Development
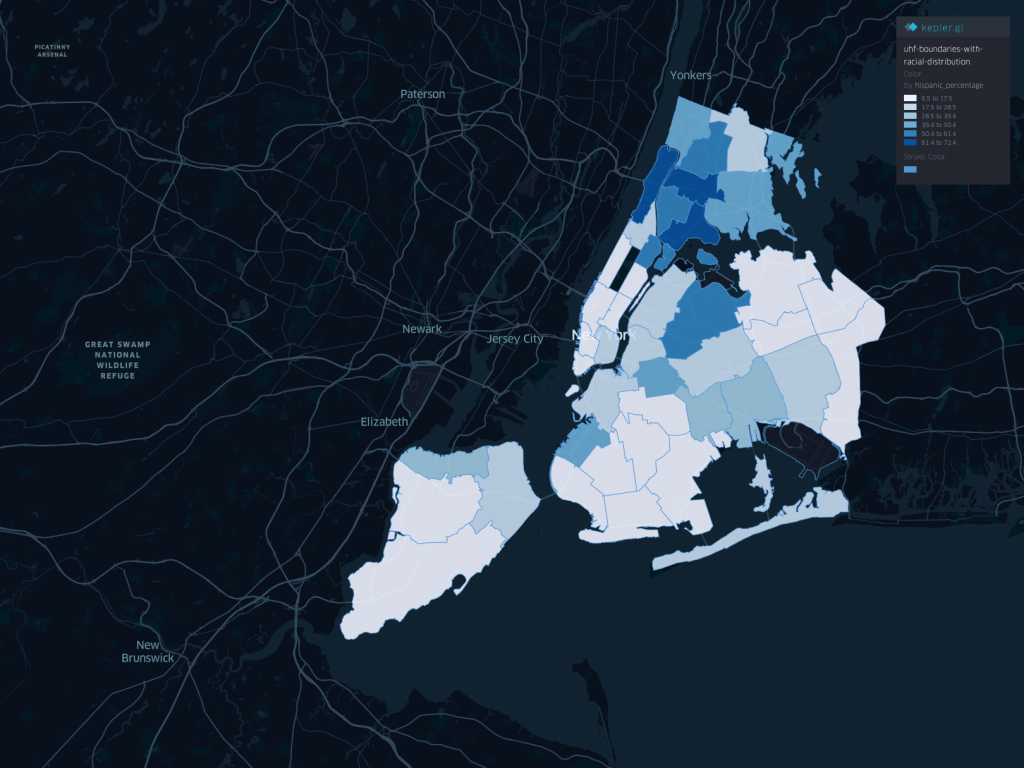
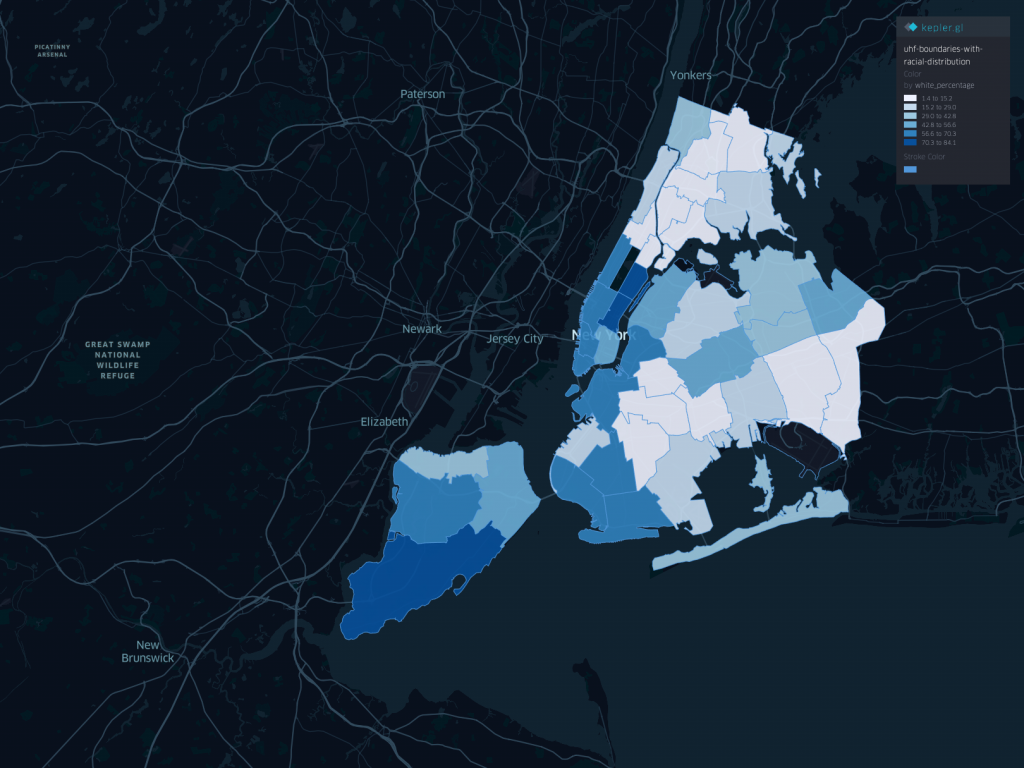
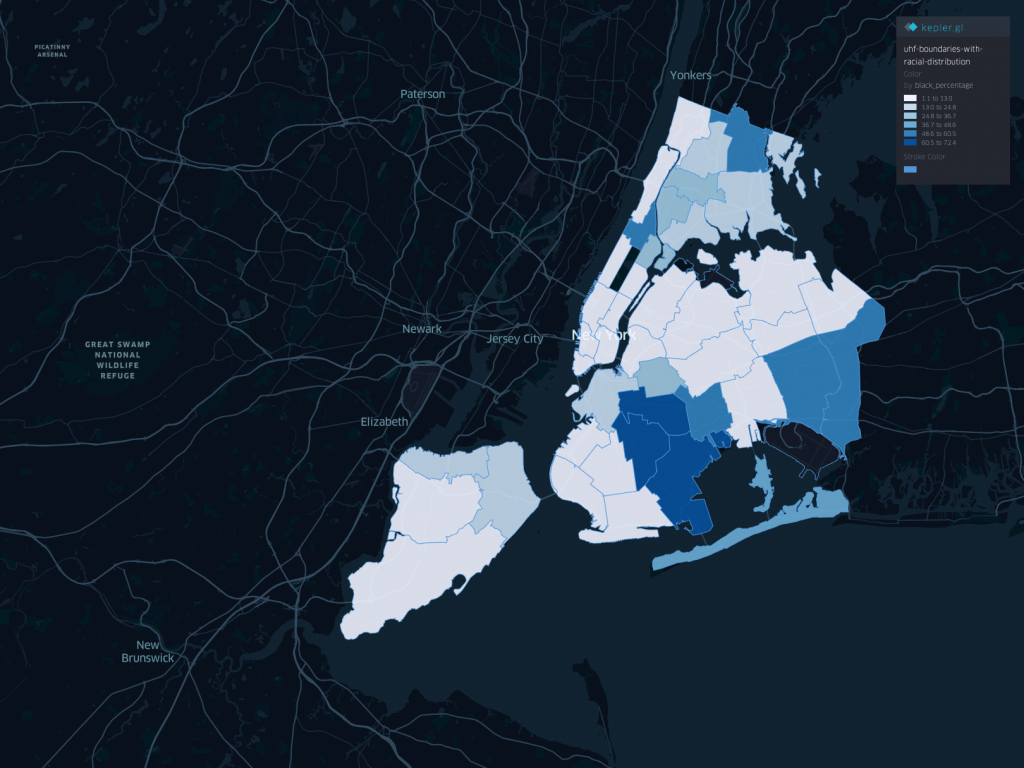
Originally, our idea was to map ethnic restaurants in New York City and find the contrasts and correlations between the racial composition of a certain neighborhood and the availability of ethnic restaurants. We started out by making maps showing the composition of certain races in each neighborhood based on the 2010 US Census.
Distribution of residents identifying as Hispanic in NYCDistribution of residents identifying as White in NYCDistribution of residents identifying as Black in NYCDistribution of residents identifying as Asian in NYC
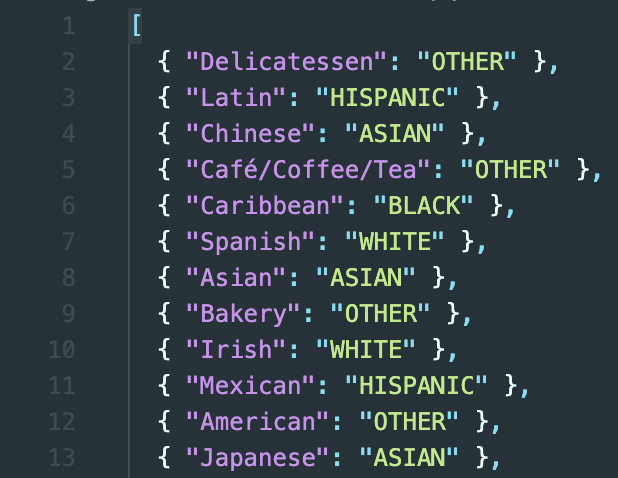
We then started categorizing restaurants based on their cuisine’s country of origin to determine which ethnicity/race does a specific restaurant caters to. We did our scripting in Node.js, so we created a map mapping each cuisine into a specific ethnicity.
As we do this, this starts to feel more and more wrong. Determining that a certain cuisine’s country of origin directly maps to the color of one’s skin is a gross simplification of something that is nuanced and full of history. Even though we started this with the best of intentions, we decided to not go forward with it. We decided to pivot into mapping the cuisine of New York City.
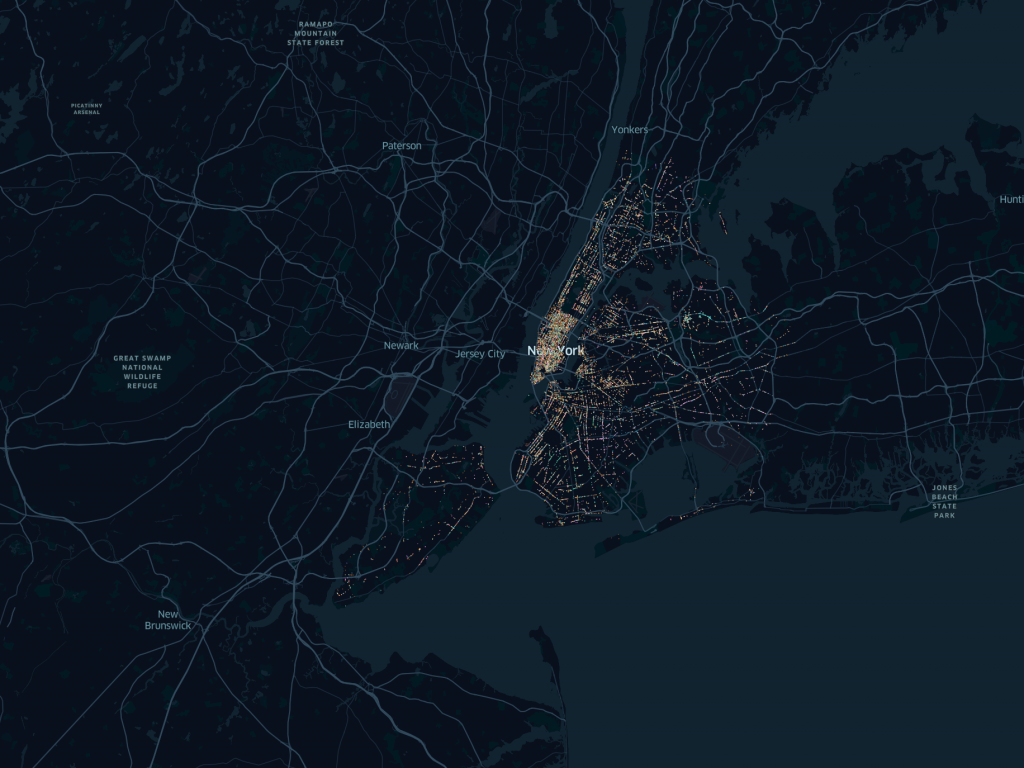
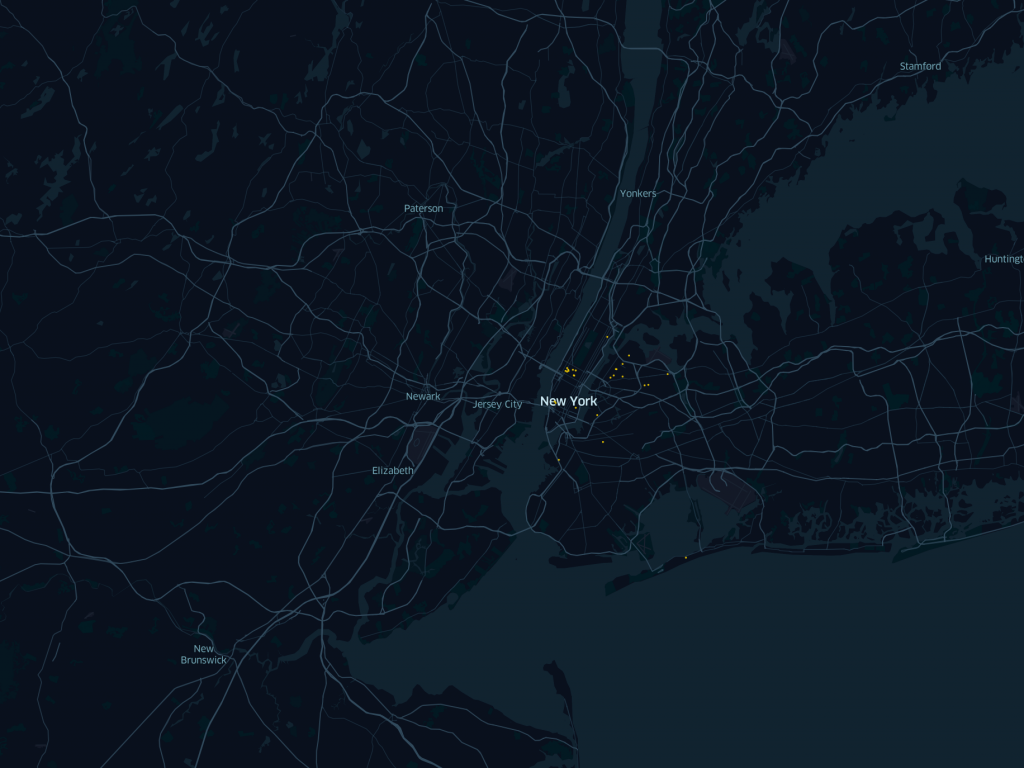
We created a few maps describing the current (as of May 2nd, 2020) state of the available cuisines in New York City.
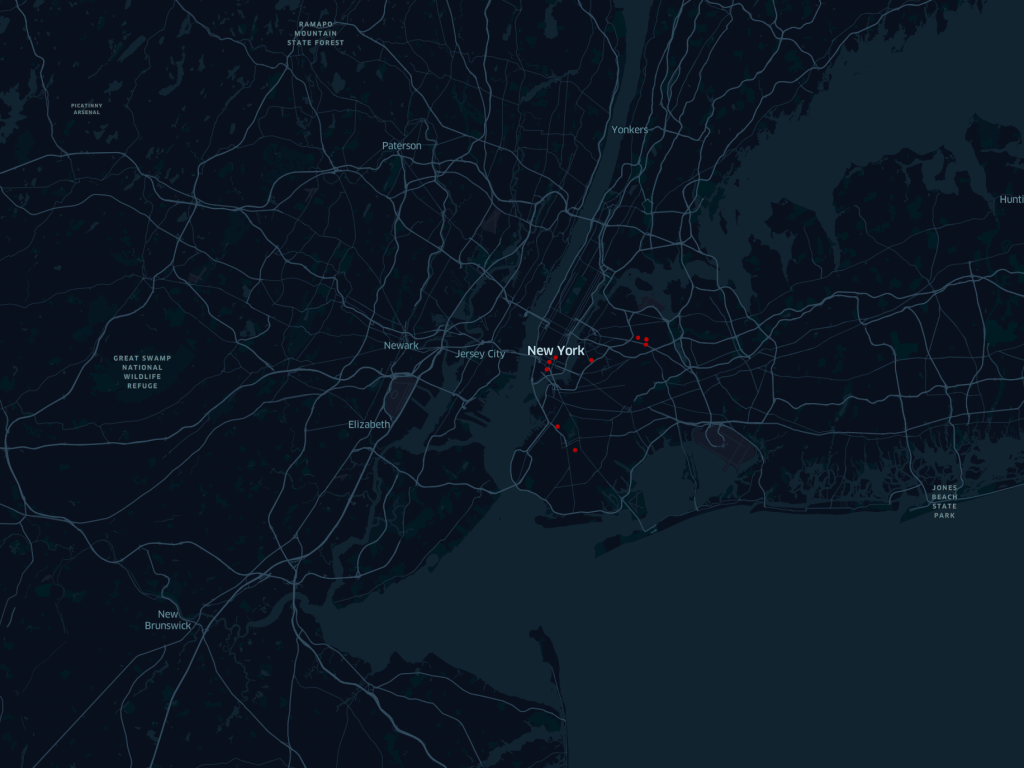
All restaurants in New York CityAll Brazilian restaurants in New York CityAll Indonesian restaurants in New York City (there are only 9)
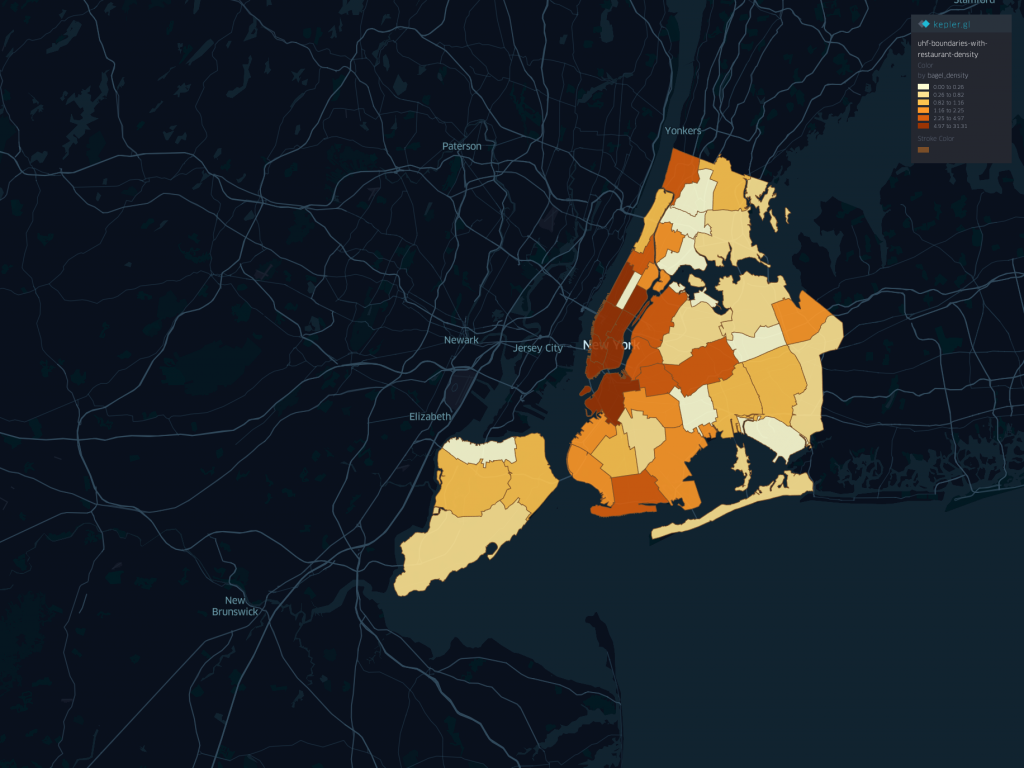
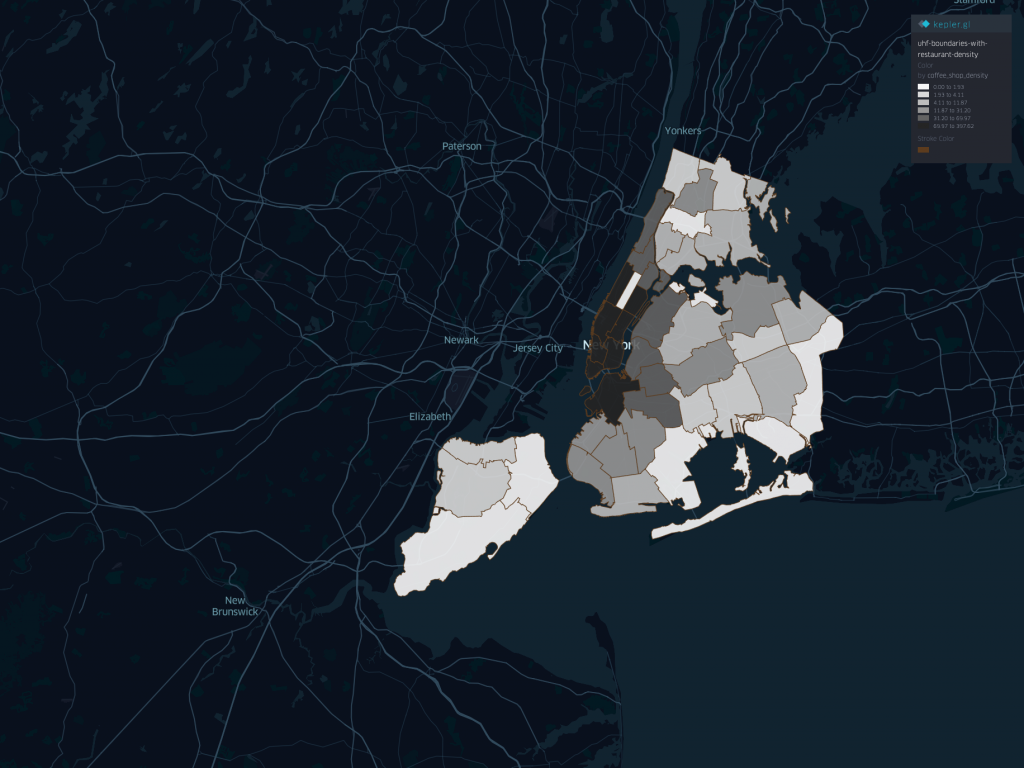
Going back to the idea of analyzing neighborhoods, we then made a map of the density of restaurants of a particular cuisine in each neighborhood. This is done by counting the number of restaurants in each neighborhood, divided by the square footage of said neighborhood. (numbers are displayed as restaurants per 100,000,000 square foot).
The density of Pizzerias in each neighborhood of NYCThe density of Bagel Shops in each neighborhood of NYCThe density of Coffee Shops in each neighborhood of NYCThe density of All Restaurants in each neighborhood of NYC
To me personally, when I think of the foods of New York, I think of pizza, bagel, and coffee. We find that it is interesting that the most popular cuisine in New York City is indeed Chinese food.
Another thing we found interesting is that the density of all restaurants in NYC inversely matches the density of Hispanic residents. We have yet to determine if this has anything to do with income brackets, education levels, or anything else.
One last note, we feel that it was important to go back to the drawing board once we realize that what we were doing was wrong. Pivoting was definitely the right decision. We encourage all technologists to periodically do a self-sanity-check. Just because we can build something, doesn’t mean that we should.
Professor Soir is a non-linear experiential virtual escape room experience that invites players to discover hidden information.
In this project, three players are given different roles as research assistants. They all work for Professor Soir. On the journey of working on their tasks, they discover certain information that requires them to work together and make the final decision together.
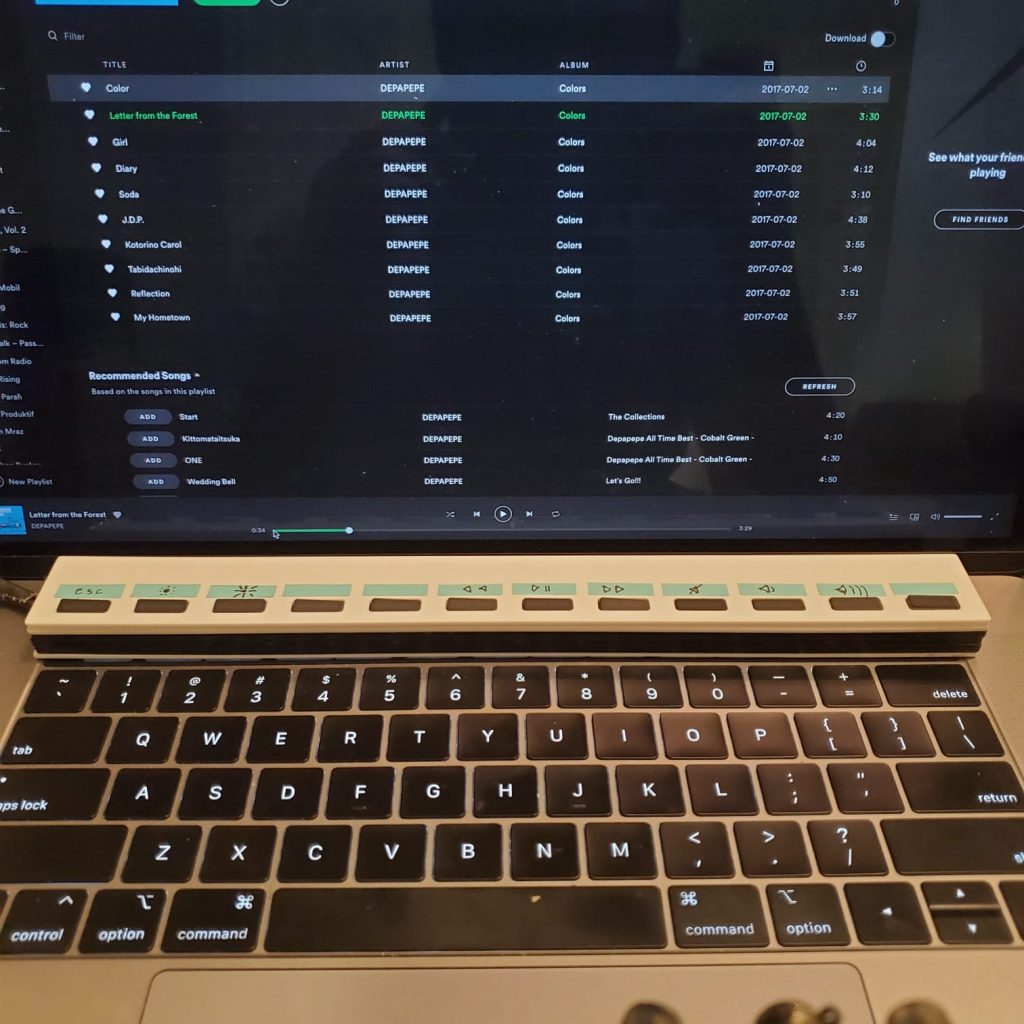
So I own a 15in MacBook Pro with the polarizing touch bar. Some people love it, some people (myself included) hate it with a passion. The lack of tactile controls results in so many accidental touches, and if you are in the terminal a lot (which I am), the lack of a tactile escape key is simply unsatisfying. Thankfully Apple fixed the escape key in the new iteration of the MacBook Pro, but sadly I am but a poor grad student and managing money is a key aspect of my life now.
The Project
This project is for the creation of a tactile touch bar replacement. It keeps the functionality of my current touch bar, with a tactile feel.
I utilized the Arduino HID Project to create this touch bar. The library allows the Arduino MKR 1010 to act as a USB keyboard. I simply tell it to send a certain keycode and the computer will act as if a certain key is pressed on the keyboard.
The difficulty I faced when I was developing this was to find the right keycode for the things that I want. Some of them are documented, whilst some are not. To do this, I wrote up a simple script that will send all of the keycodes one by one. Through this, I was able to find the keycode for turning my screen brightness up and down. However, I still wasn’t able to find the keycode to turn my keyboard backlight up and down, and the keycode to lock my screen.
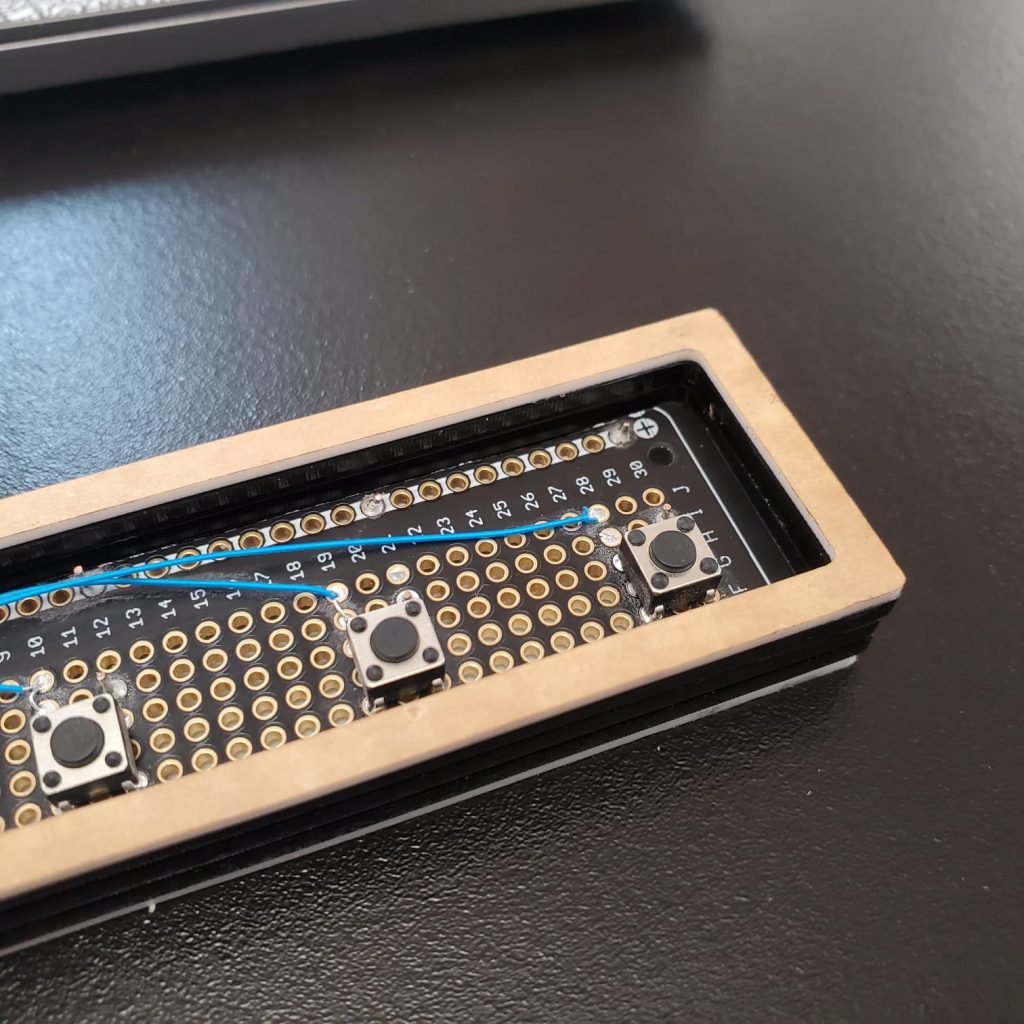
On the circuit side, it’s much easier. It’s simply 12 buttons connected to the digital inputs of the Arduino. Very simple.
Some compromises I made:
I still couldn’t find the keycodes for turning the keyboard backlight up and down
I still couldn’t find the keycodes to lock my mac
The Fabrication Process
This was very difficult for me. I had the idea of creating a thin small piece the exact size of the original touch bar with a custom board inside. There were a few problems with my original idea:
Learning Eagle proved to be too large of a barrier of entry for me. Though I think this will still be manageable if I put a significant amount of effort into it.
The super small and thin buttons I wanted to use didn’t fit my protoboard.
They keycap mechanism added a significant amount of thickness to the product.
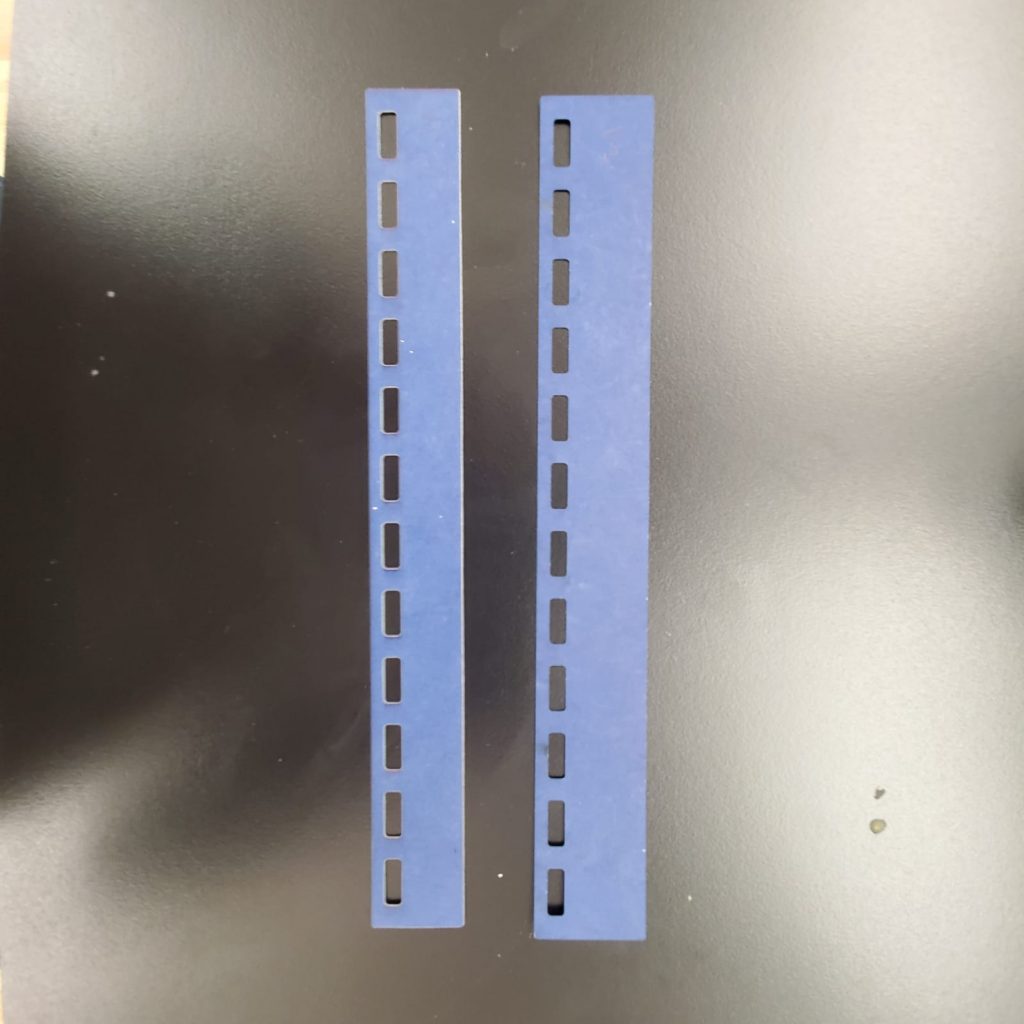
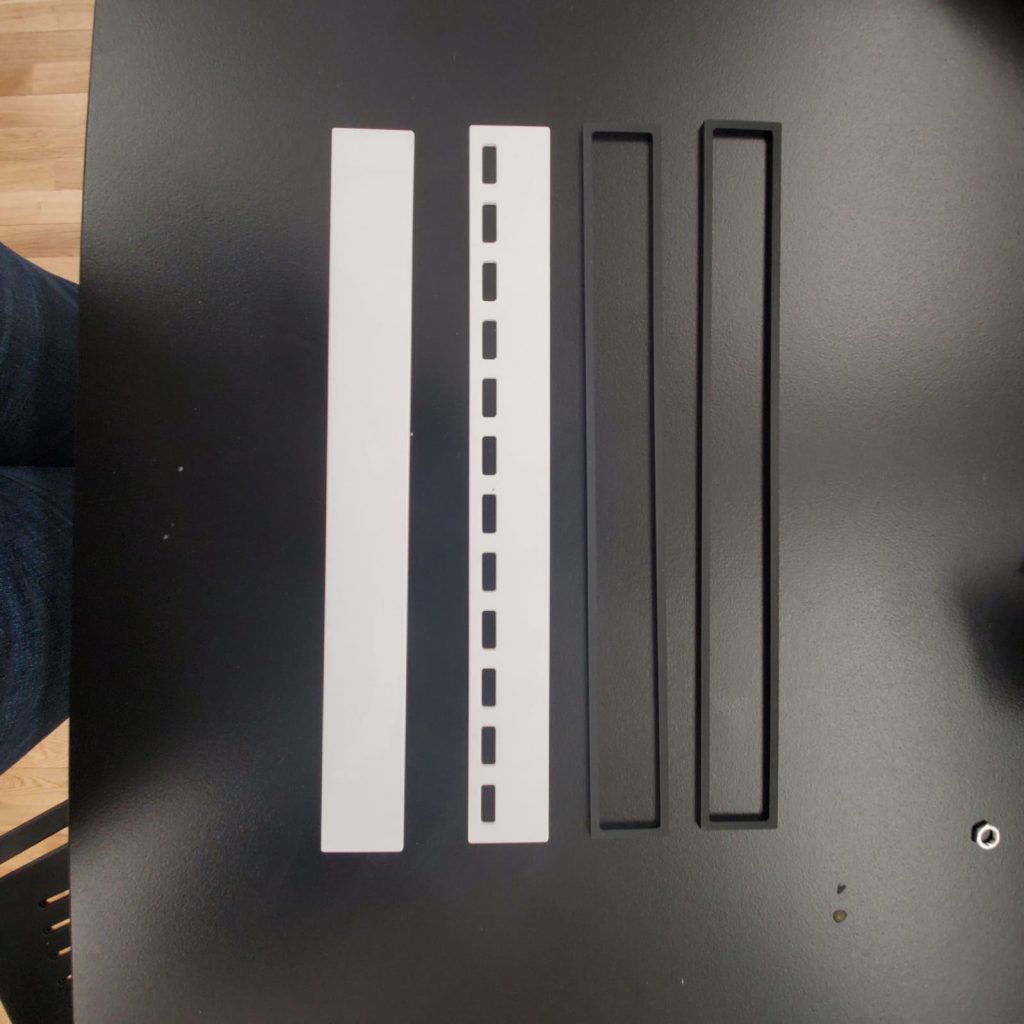
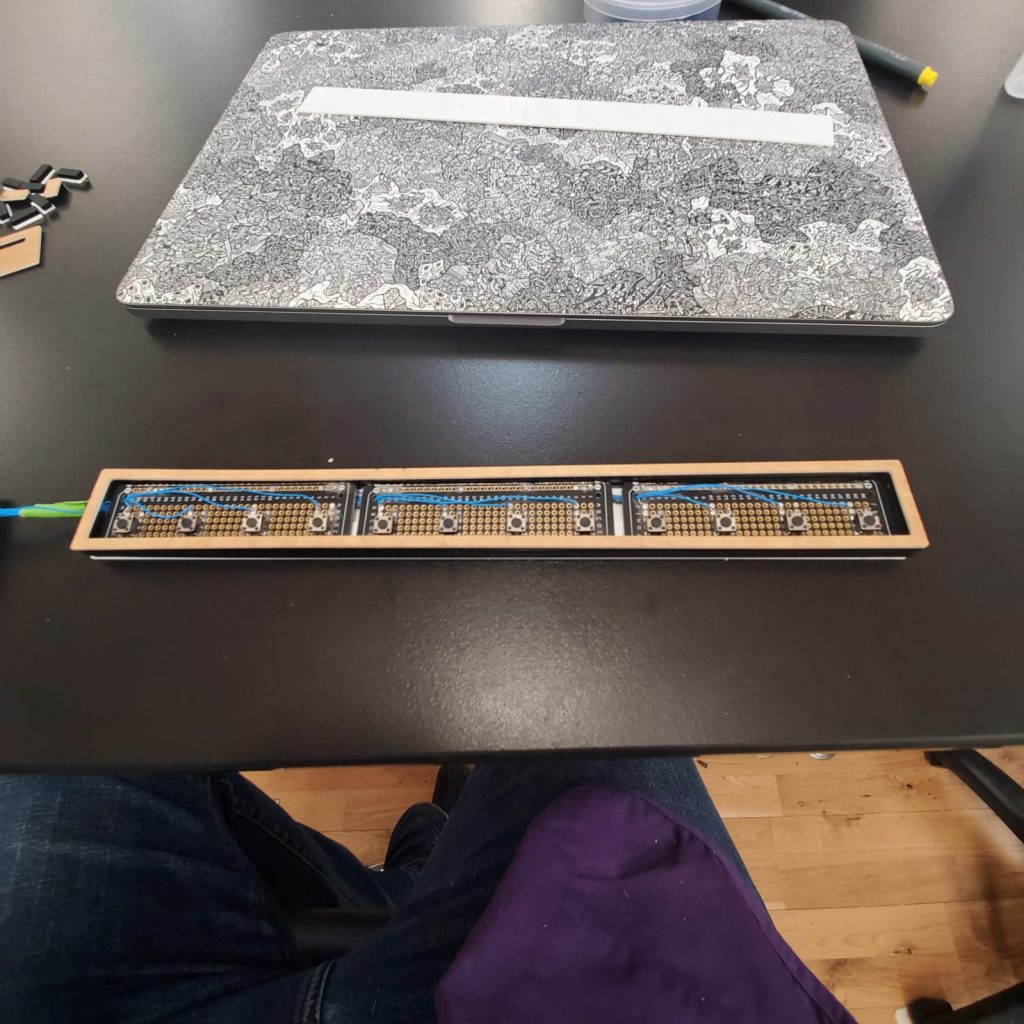
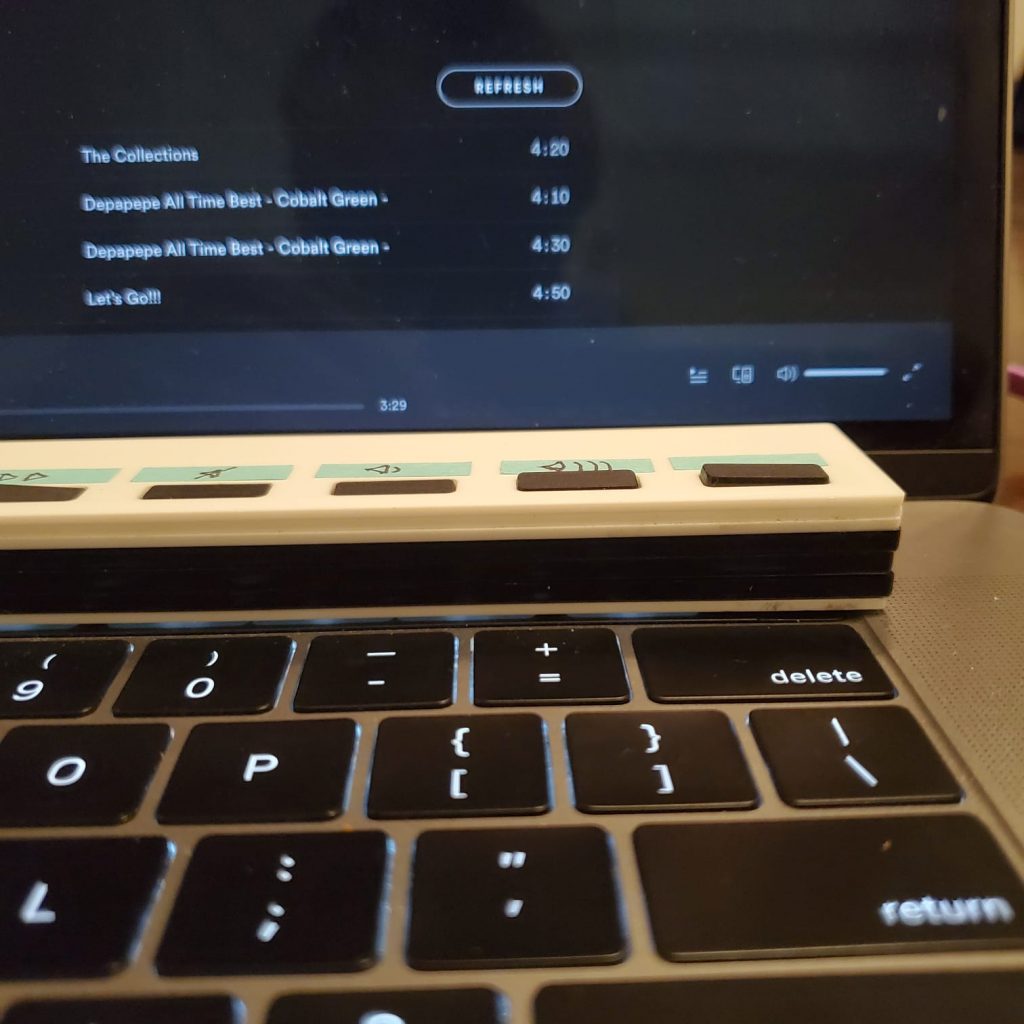
After some back and forth, I landed on the decision to build it with acrylic that is cut on the laser. It has a bottom piece, middle piece, and top piece (please see pictures on the bottom of this page for more detail). Thankfully I was able to do it on “turbo mode” before the ITP facilities became unavailable.
Some compromises I made:
I didn’t get a perfect fit on my keycaps, so it wobbles a bit.
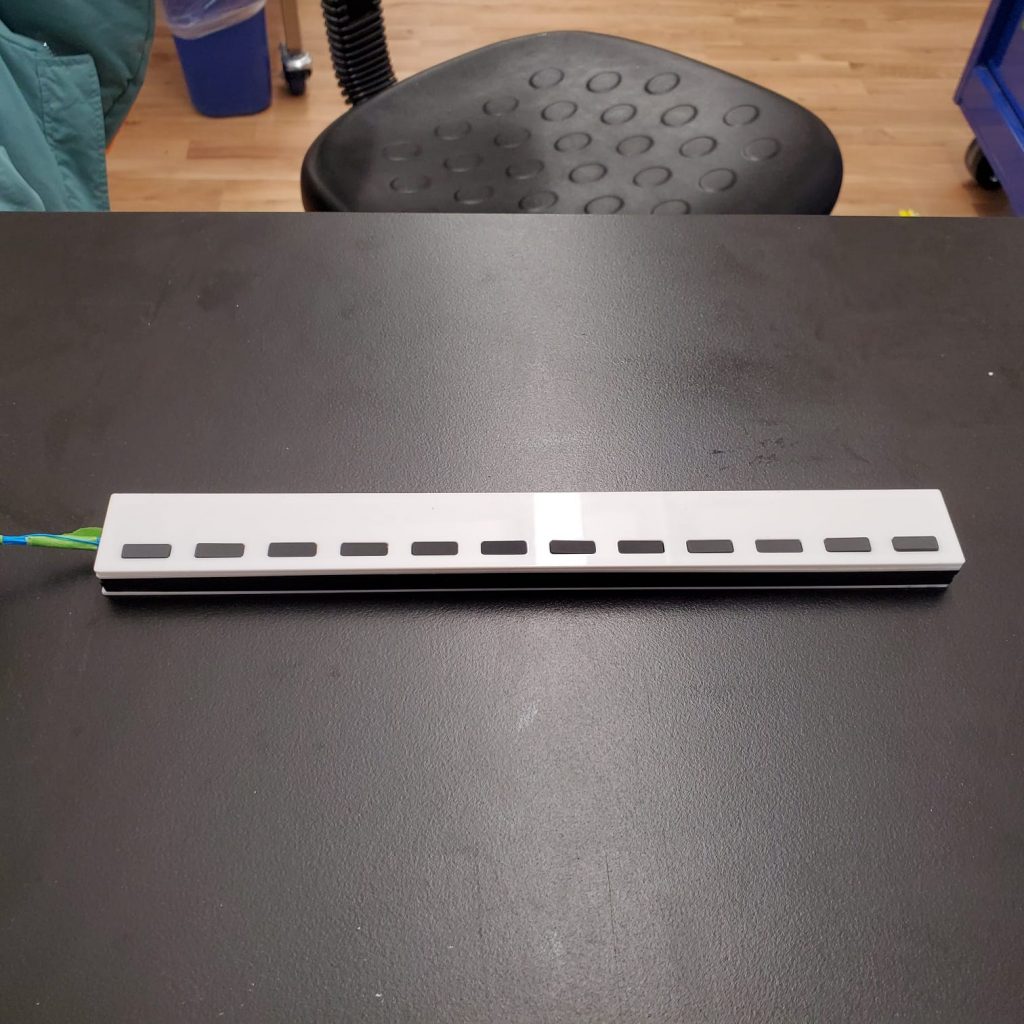
I didn’t get to paint it. I was going to paint it with metallic silver paint. Ideally, I wanted the body to look exactly like the MacBook brushed aluminum body.
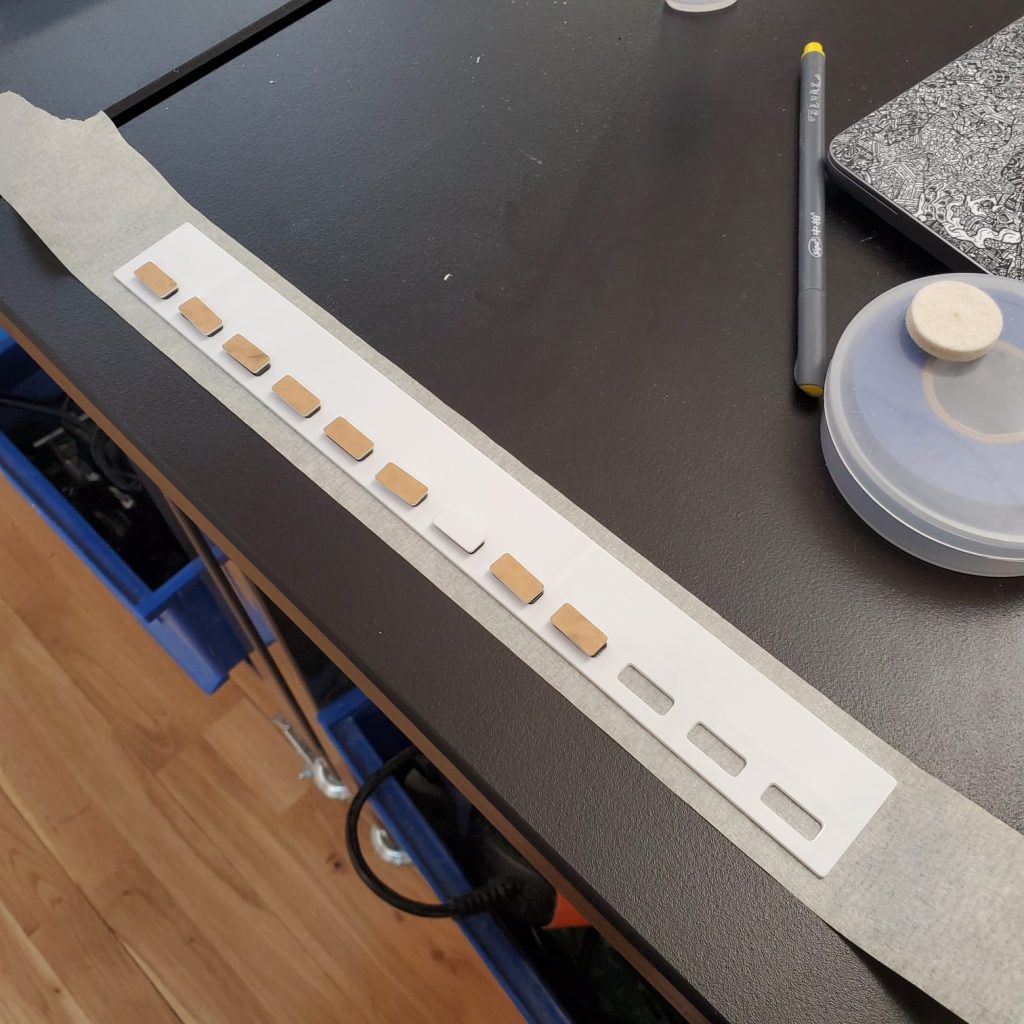
I didn’t get to engrave the button labels on the keycaps. Instead, I made a makeshift label using sticky notes cut with a hobby knife.
I had to glue the whole thing down. Ideally, I wanted to create some sort of friction fit mechanism using the mill. The motto of “Screw it, don’t glue it” turned into “Screw it, I’m gonna glue it“
Project in Action
Touch Bar in Action
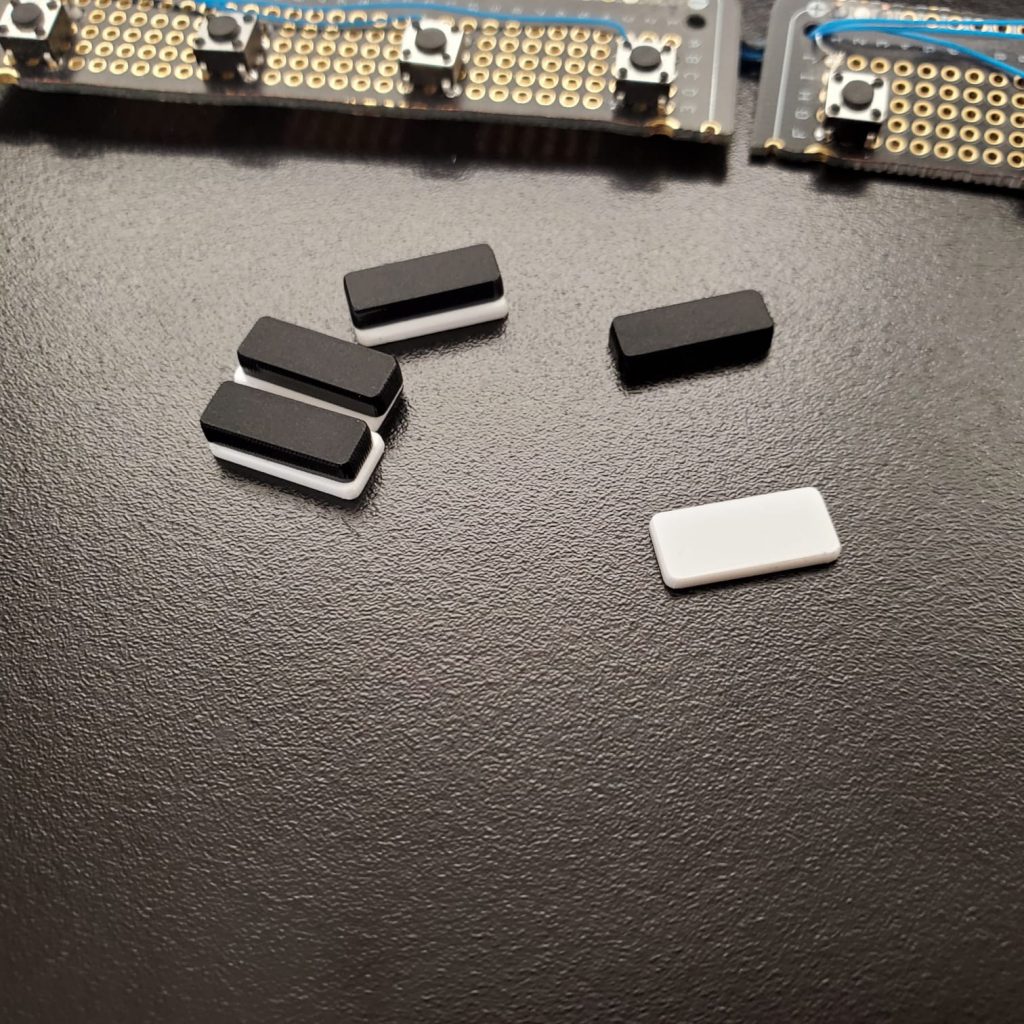
Pictures
First PrototypeFront, back, and middle piecesKeycaps, made by gluing two pieces of acrylic togetherProtoboards put inside assembled enclosure (without the top)Closer look at the bodyKeycaps along with the top part of the enclosure. I use tape to keep them in place.Enclosure fastened with acrylic glueTouch bar sitting on top of the keyboardIt’s still pretty thick
Reflection
All in all, I am mildly happy with this project. Considering everything that is going on, I’m happy that this project works and it does not look too bad. Also, I am happy that I was able to perform the fabrication part of it before the facilities became unavailable.
Did I achieve what I wanted to achieve? Probably about 70% of it.
Did I learn new things? Yes
Is this product a product that I want to use every day? No
Can this product be iterated upon into something I’ll want to use every day? Yes
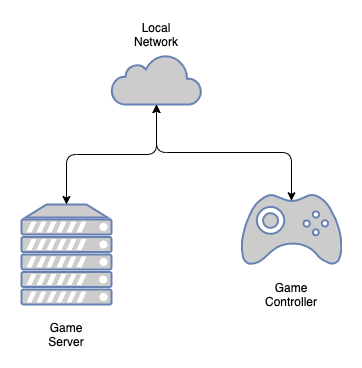
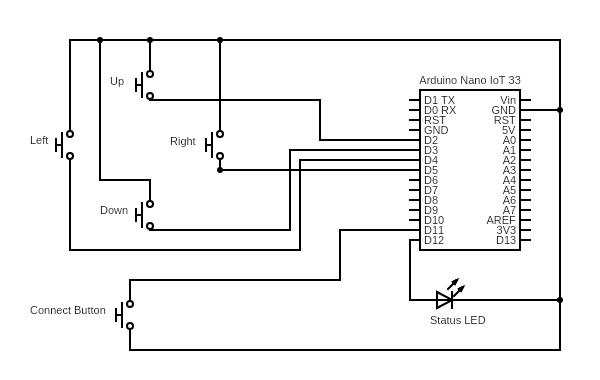
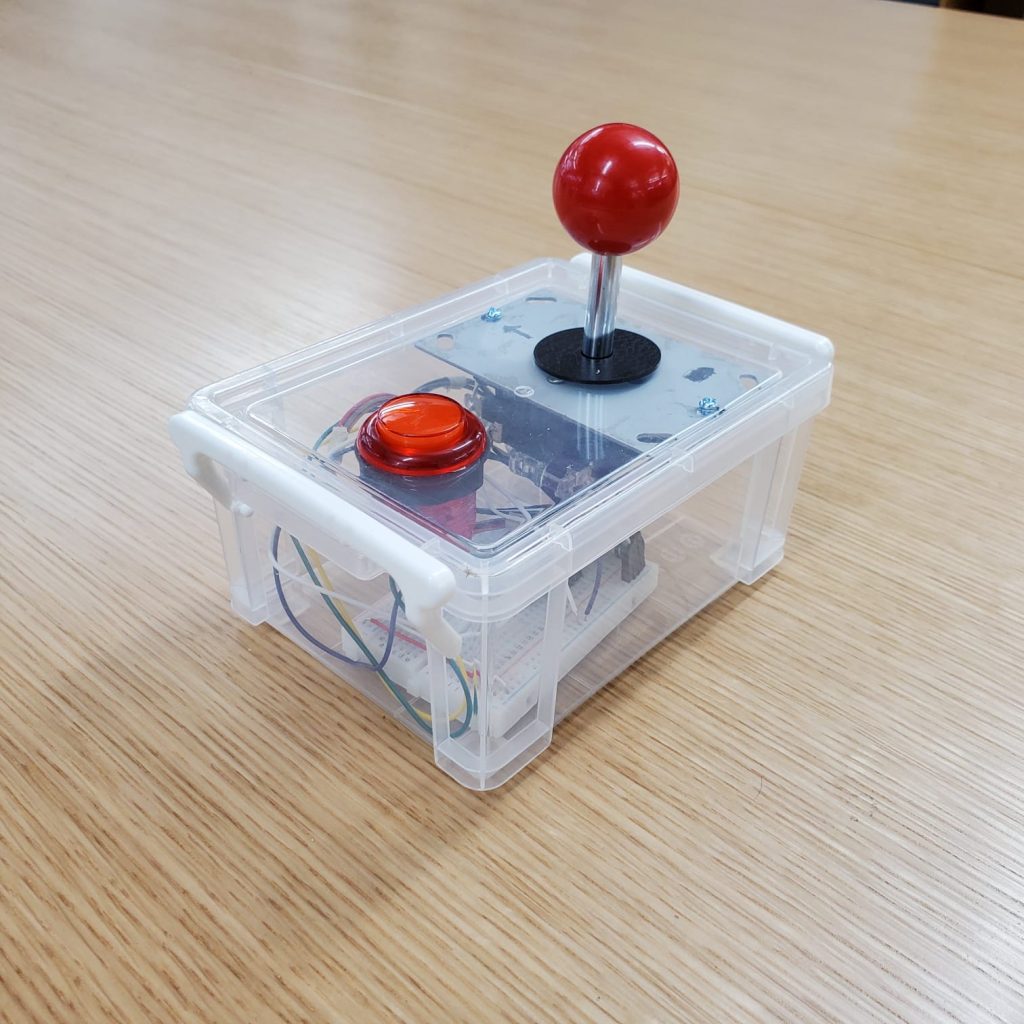
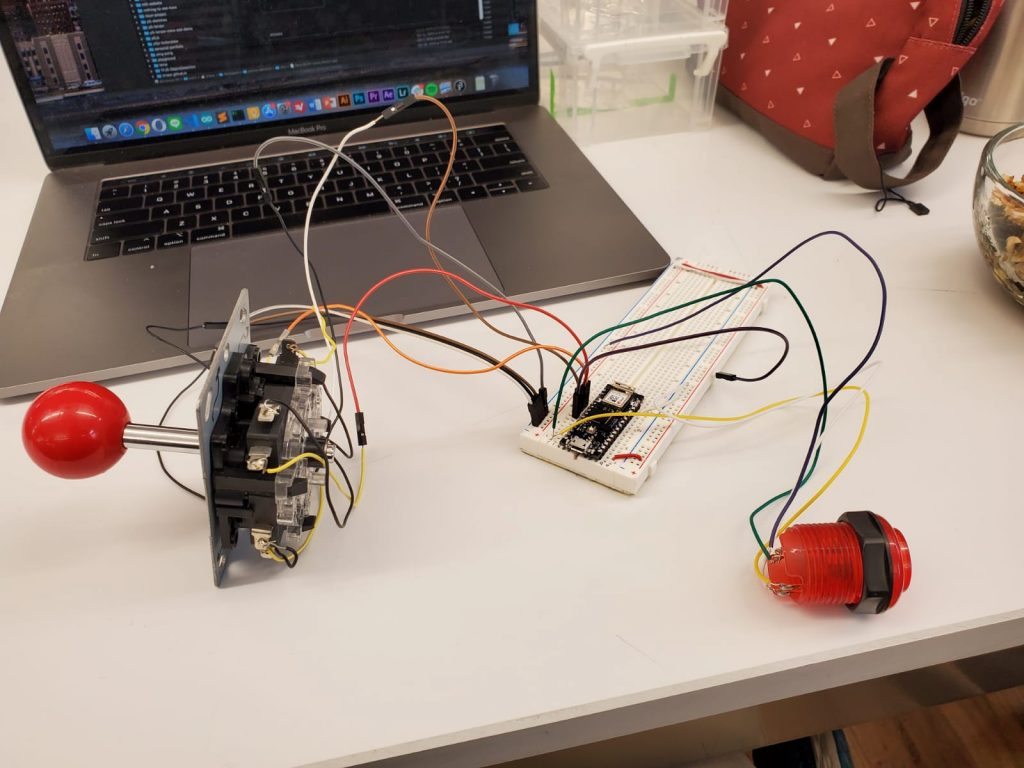
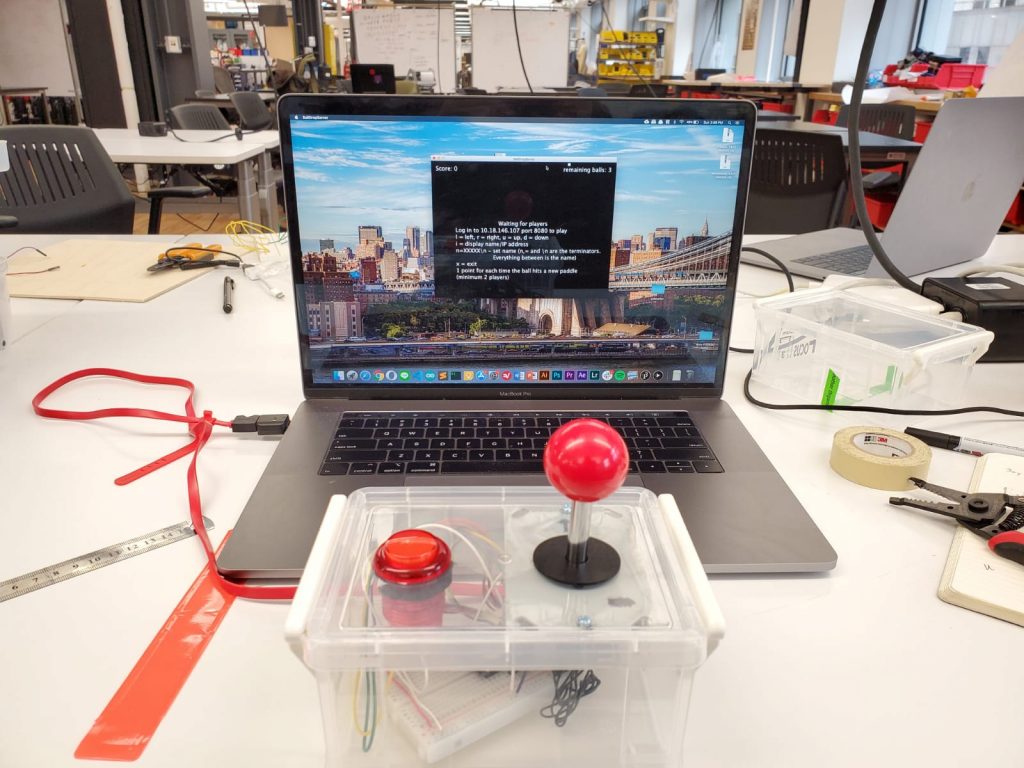
This week I am making a physical wifi-enabled controller for an online game called Ball Drop. I will be using an Arduino-Nano-IoT-33 for this since it has an already built-in wifi shield. To actually play the game, I will be using a 4-way joystick to control the game, and one push button with a built-in LED as the connect/disconnect button and an indicator light.
The indicator light will show one of four states: 1. Off – This means that the controller is off. 2. Slow blink – This means that the controller is on, but is not connected to WiFi. 3. Fast blink – This means that the controller is connected to WiFi, but not connected to the game server. 4. On – This means that the controller is connected to the game.
The connect/disconnect button will be used to connect and disconnect to the game server.
System Diagram
Circuit Diagram
During the creation of this controller, I borrowed heavily from the WiFi Nina example code. The full source code for this controller is available here.
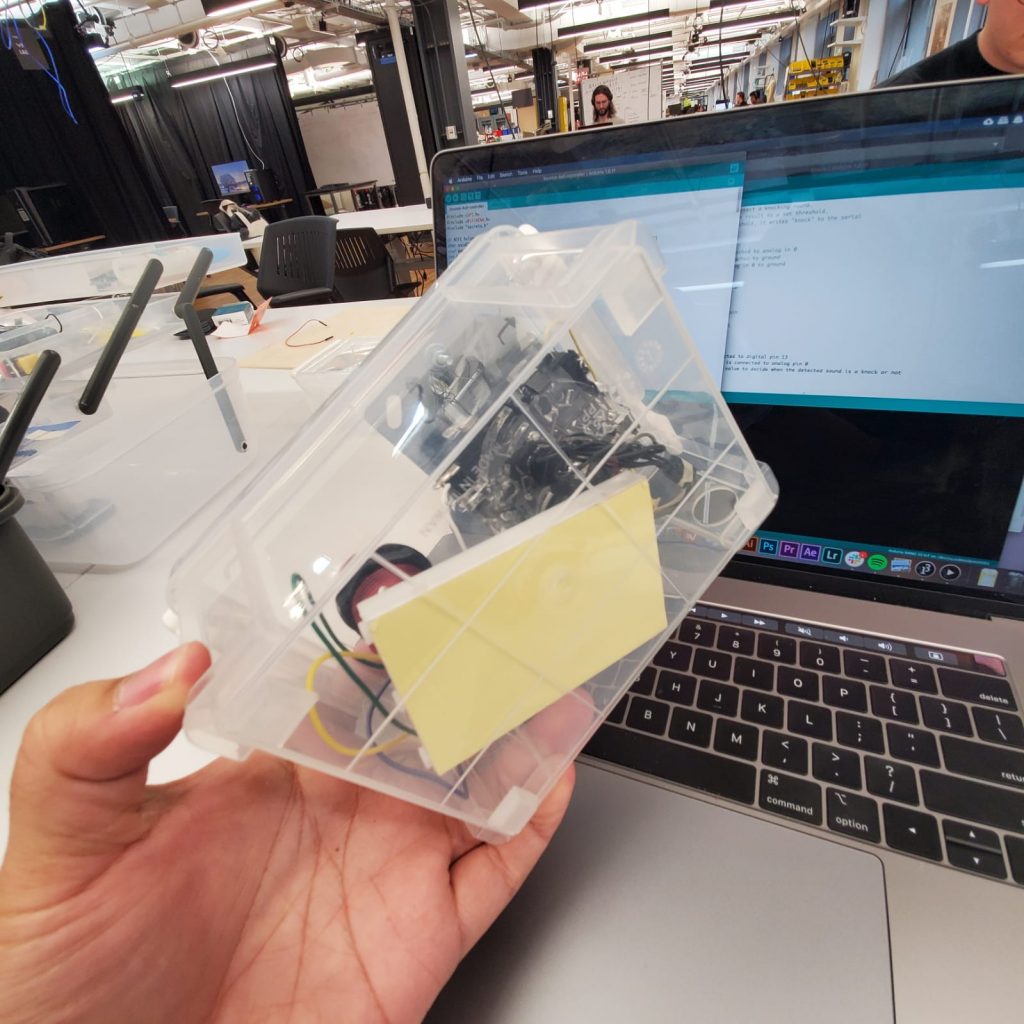
Below are some photos of the controller. I used a ready-made plastic box for the enclosure with some rubber feet at the bottom, I think it adds a nice touch.
And this is a demo of the controller in action!
I am very happy with how the controller turned out. I do enjoy the transparent case, even though I do admit that I can do a better job of organizing the wires.
This week I’m playing around with pixel-level manipulation on images and the webcam feed on a web browser. Inspired by this video, I created a “mirror of mirrors”. The idea is to create a mirror made out of tiny mirrors. It is made using p5.js. The sketch can be viewed in this link.
After creating a sound-walk of my own, some things popped into my head that I feel are worth noting.
Don’t be afraid to experiment. This is more of a personal note, but when creating things like this, it’s good to keep an extremely open mind to all of the possibilities. Something does not have to be a tried and tested thing to be worth doing. Any idea is always worth doing.
When collaborating, be both openminded yet defensive of your ideas. Early on, whenever collaborating, I would be pretty defensive of my ideas or methods. I’ve always felt that I have good justifications for my ideas and that they are worth fighting for. As time goes on, I realized that it was not the way to go. When collaborating, it is more important to give room for others. That way things will go smoothly. However, now I feel that both are equally important. It’s a tricky thing to balance.
Sound is powerful. Before doing this project, I didn’t realize how powerful sound is as a storytelling medium. I’ve always considered music to be powerful, but not regular sounds. I was immensely wrong.
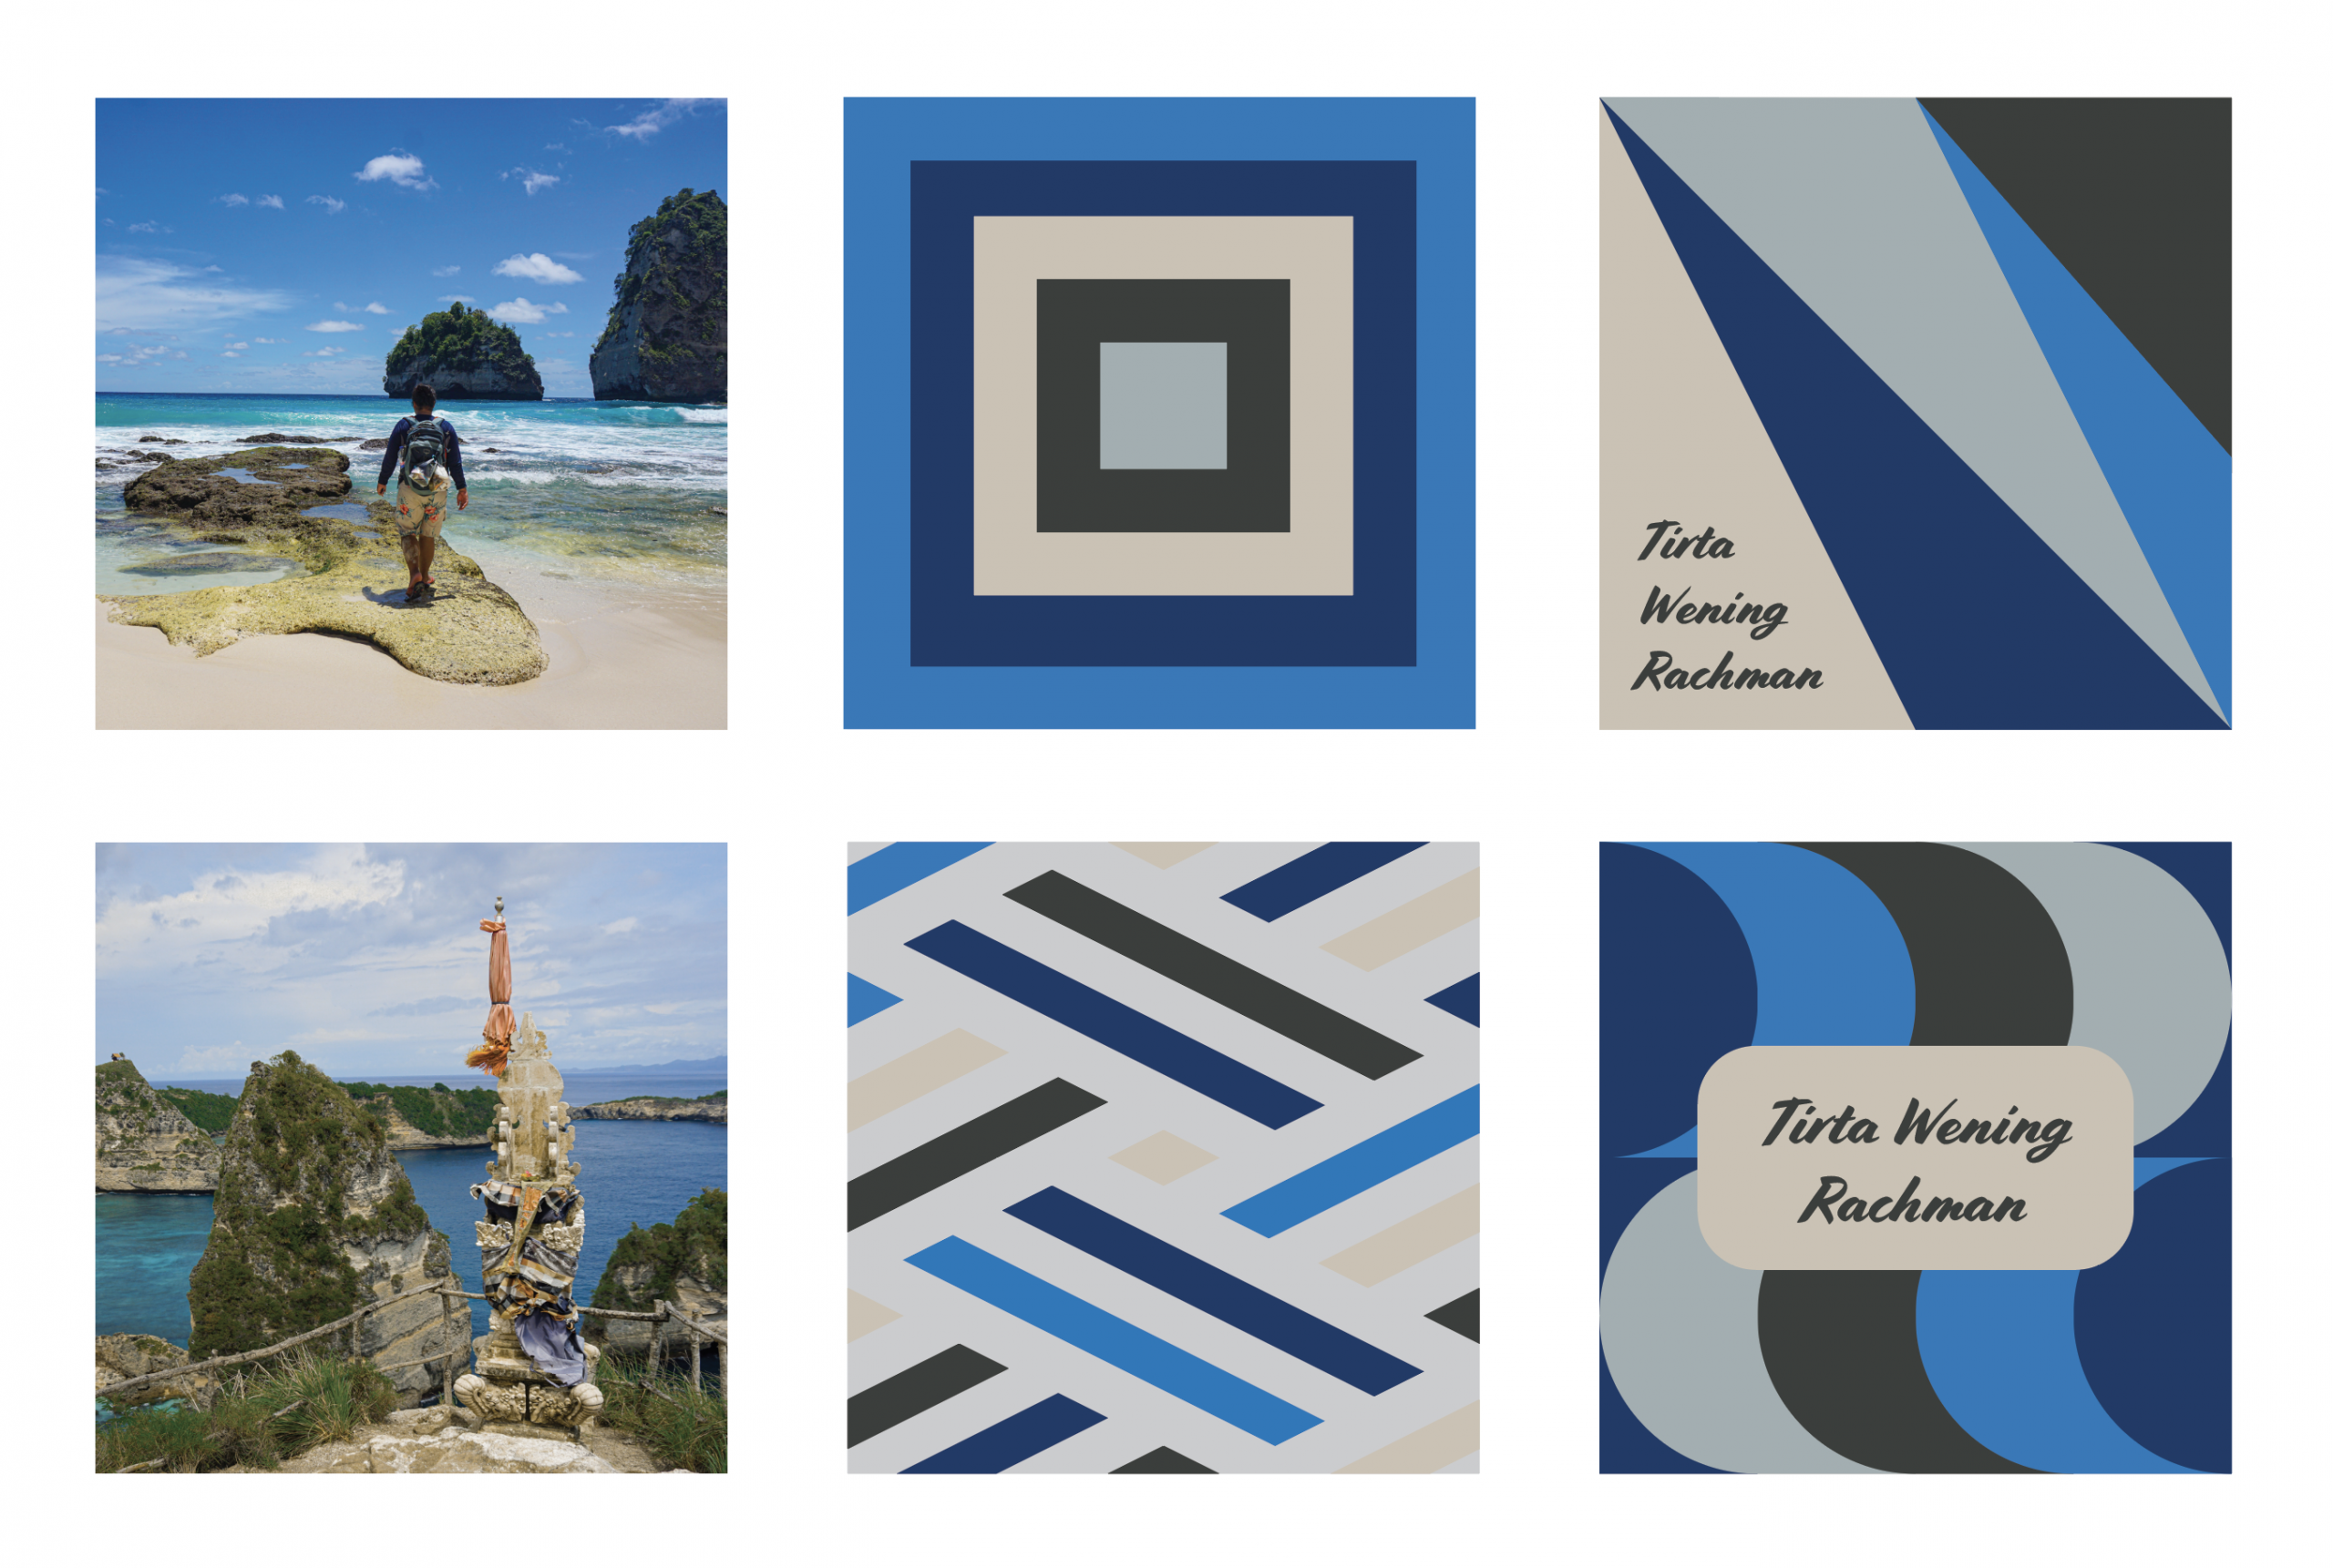
This is the color palette I have chosen for myself. In my opinion, it is elegant, modern, effective, and somewhat understated. Along with it, I have made a set of six compositions using my color palette. Two of them is an edit of photographs using Lightroom, another two are random geometric patterns that showcase the colors, and the last two are designs for a possible personal logo for branding purposes.
Today’s fabrication project is to create five of something. I decided to create a photo/postcard holder out of wood.
My first thought is to cut up a long piece of hardwood into pieces and cut the slits for the photo later on. This proves to be a terrible mistake. It turns out that I can only cut the slits when the wood is still in a big piece. The miter saw that I was using is too dangerous to be used on a small piece of wood. Back to the drawing board.
Original cut wood (the mistake), I made six of these
After some consultation with Ben, I decided to cut the slits first using the miter saw and only after the slits are cut, I’d cut the wood into pieces. Unfortunately, I made the mistake of only getting 2.5x the amount of material that I think I’d need (the rule of thumb is to get 3.14x the amount of material). This resulted in one of my pieces to be smaller than the others. After cutting it up, I sanded the holders using the belt sander to round off the sharp edges and smooth out the surface.
Miter saw setup
The holders after they are cut-up and sanded with the belt sander
Luckily, after this stage, Jake offered up some of his wood stains so I didn’t have to buy my own. I tried it out first on my previously cut wood to see how the color would turn out. After I’m feeling confident, I painted it on my holders. After letting it dry for 12 hours, I gave the holders some final sanding with a fine-grit sanding sponge. The final product looks pretty good!
Me staining the wood with Jake in the background
The finished product, notice how one piece is a bit smaller than the others. Can you spot it?
Finished product working in action
As you can see, the finished product looks great. I’m really happy with how it turns out (other than the mistake). If there’s anything that I learned from this exercise, is to truly abide by the “Multiply everything by pi rule” – when acquiring materials, always try to get 3.14 times the amount of material that you think you’ll need.